Real estate photo enhancement uses AI to fix the exposure, color, clarity, and sky in property photos, turning raw shots into publishable listing visuals in about 20 seconds per image. It is the fastest improvement you can make to a listing workflow, it works on phone photos, and it compounds with virtual home staging when a property also needs furniture. This guide explains what enhancement does, how to run it step by step, what a good before-and-after looks like, and where it fits in your process.
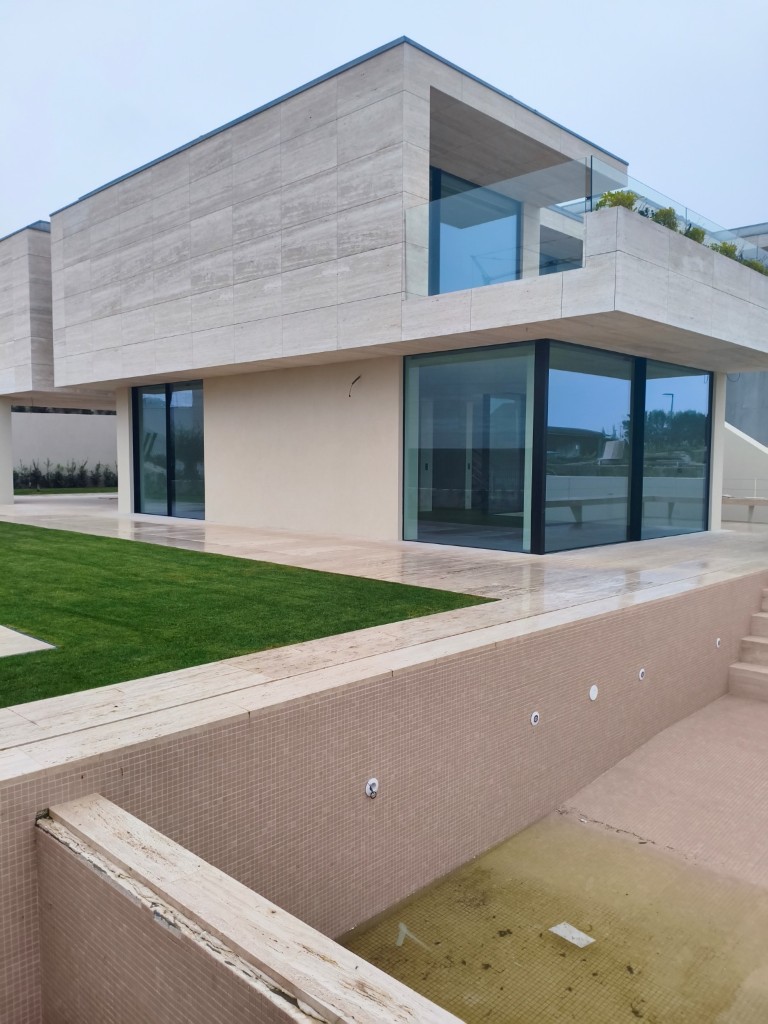
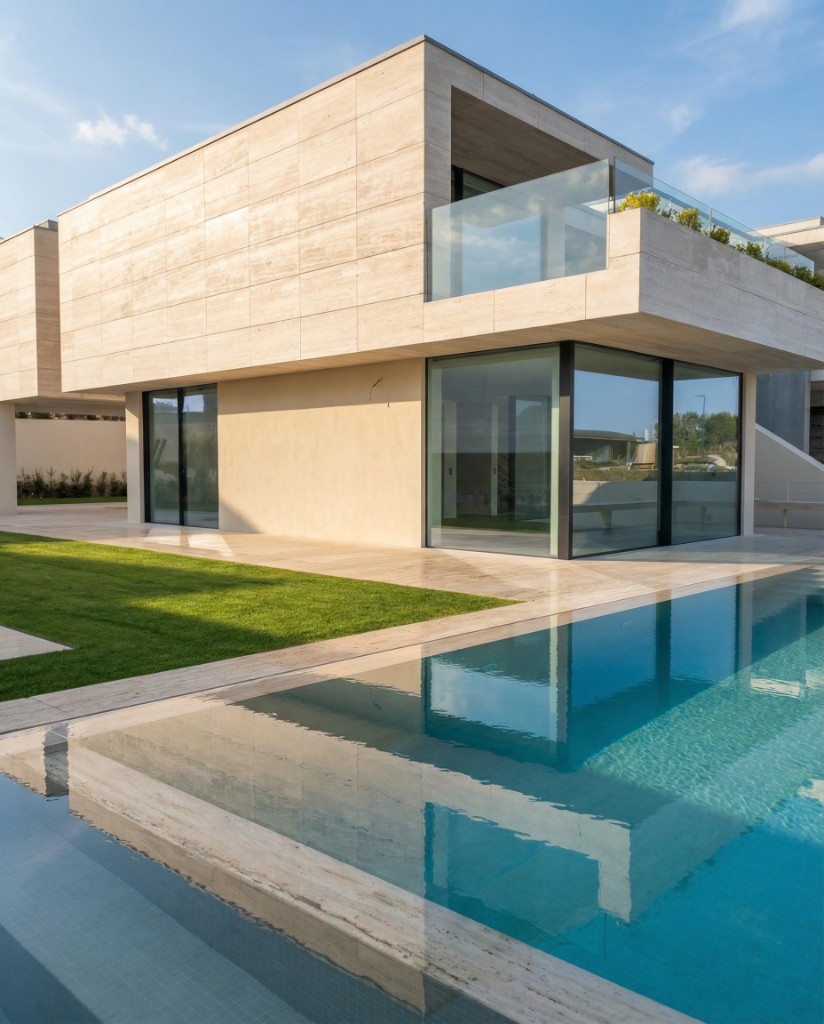
What AI photo enhancement actually does
AI photo enhancement handles the repetitive, technical edits that used to require a professional retoucher or an outsourced editing service with a next-day turnaround. In PhotoStaging the prompts for these edits are pre-built around real estate problems — dark interiors, blown-out windows, orange lamp light, grey skies — so the workflow is one click, not a blank prompt box.
A single enhancement pass typically addresses all of the following at once:
- balanced exposure across bright windows and darker interiors (the HDR look, without the halo artifacts)
- corrected white balance so whites are white and wood looks like wood, even under mixed lighting
- improved sharpness and clarity without the crunchy, over-processed look
- vertical lines straightened where the lens or the angle bent them
- clean, realistic sky replacement on exteriors when the original sky is flat or overcast
Why listings need it
Raw phone or DSLR photos rarely match the image quality buyers now expect on portals. A dark living room reads as small; an orange-tinted bedroom reads as dated; a grey sky over the facade reads as a grey neighbourhood. None of those impressions are about the property, but all of them cost clicks.
Buyers compare your listing against the twenty listings next to it in the search results, most of which were shot or edited by professionals. Enhancement closes that gap in seconds and gives every listing in your portfolio the same visual floor, whether the photos came from a photographer, an agent's phone, or a seller.
The key adjustments PhotoStaging applies
Each image goes through a stack of AI passes, each solving one problem. You do not need to know which pass does what — but it helps to understand what is being fixed so you can judge the result.
One-click real estate photo enhancement in PhotoStaging
Upload a listing photo and watch light, color, and clarity get corrected in one pass.
Exposure and dynamic range
Recovers blown-out windows and dark corners so the whole room is readable in a single frame. This is the edit that makes the biggest difference on interiors shot against a bright window.
White balance and color
neutralizes mixed lighting — warm bulbs plus cool daylight — that makes interiors look orange or green. colors end up natural rather than saturated, which matters for trust: buyers are quick to spot a photo that looks 'too good'.
Perspective and clarity
Straightens verticals bent by wide-angle lenses, removes noise from high-ISO phone shots, and sharpens edges without adding artifacts. The room keeps its true proportions.
Sky and exterior
Replaces a flat or overcast sky with a realistic blue one and lifts the facade. For when to use a dusk sky instead, see day-to-dusk and sky replacement for listings.
How to enhance real estate photos with AI, step by step
This is the repeatable process that works for most listings. It takes a few minutes for a full property once you have done it twice.
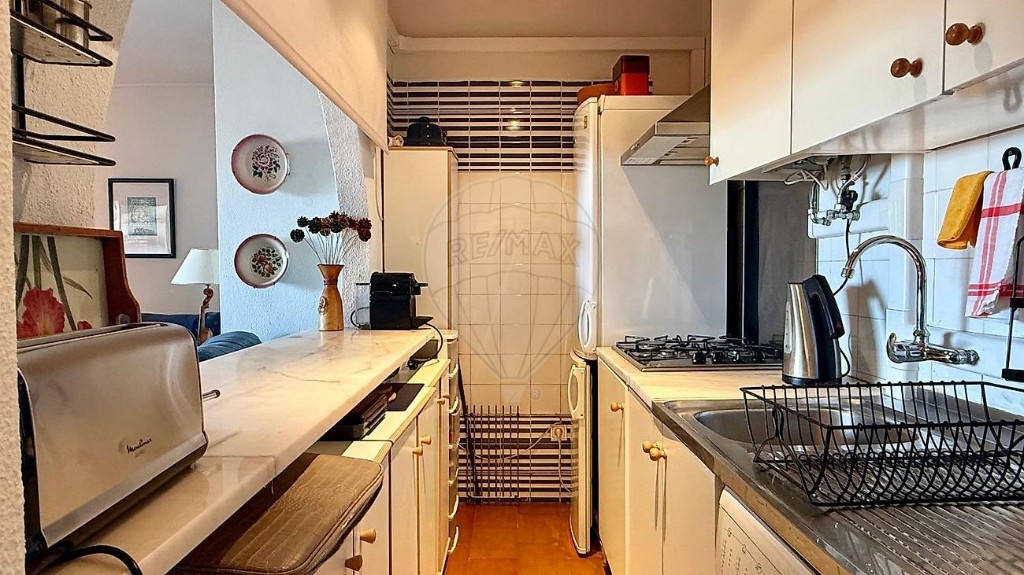
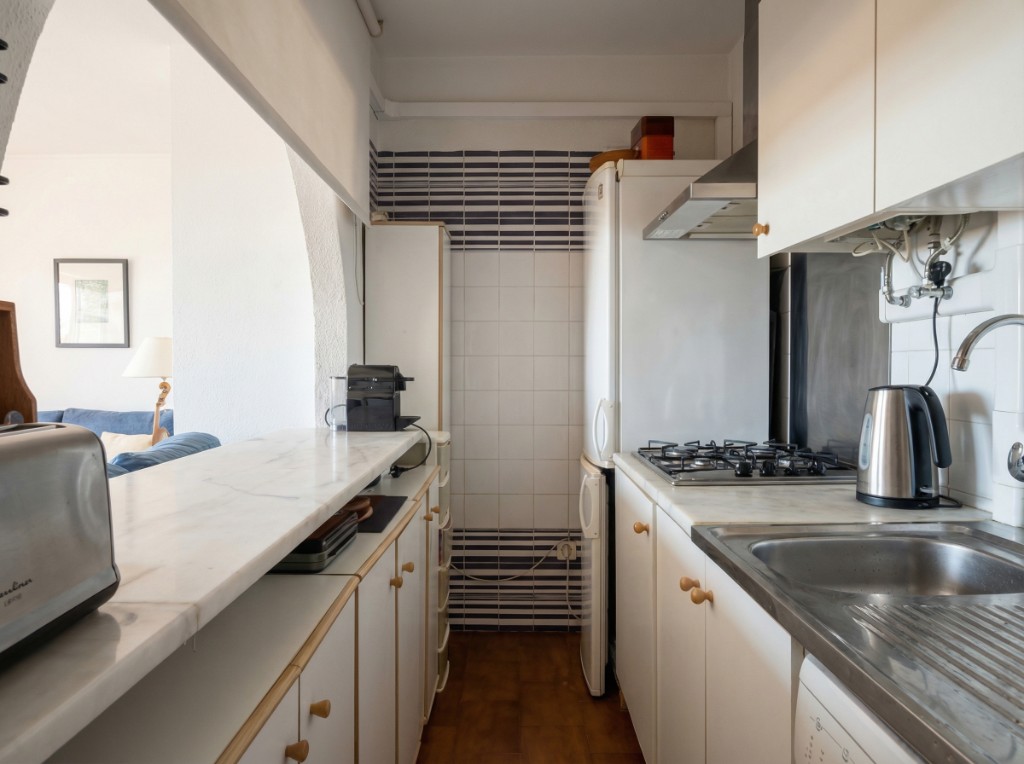
1. Capture the best input you reasonably can
AI fixes a lot, but consistency across a whole listing is better when the inputs are similar. Shoot in the brightest natural light available, turn on every interior light, keep the phone or camera at chest height, and frame from a corner so two walls are visible. Do not worry about perfection — a slightly dark or slightly tilted photo is exactly what enhancement is for. For phone-specific tips, read how to improve realtor photos taken with a phone.
2. Upload the listing as a batch
Load all photos of one property together. Processing them in the same session keeps color and exposure consistent from room to room, which is what makes a gallery feel professionally shot rather than assembled.
3. Run enhancement
Select the enhancement workflow in PhotoStaging and let it apply exposure, white balance, perspective, and sharpness corrections automatically. Each image takes about 20 seconds and uses one credit. There is nothing to type unless you want something specific — for instance, 'keep the warm evening light' on a sunset shot.
4. Review the edge cases
Most rooms are ready as-is. Spend your review time on the ones that are hardest to get right: rooms with a large window in frame, bathrooms with mirrors and glossy tiles, and exterior shots. If one comes back with an odd tone, regenerate it or send it to PhotoStaging support on WhatsApp with a note about what you want changed.
5. Stage what needs furniture, then publish
If any room is empty, run virtual home staging on the enhanced version. Then download the full-resolution JPEGs and upload to your portals — no special format is needed.
Before and after: what good enhancement looks like
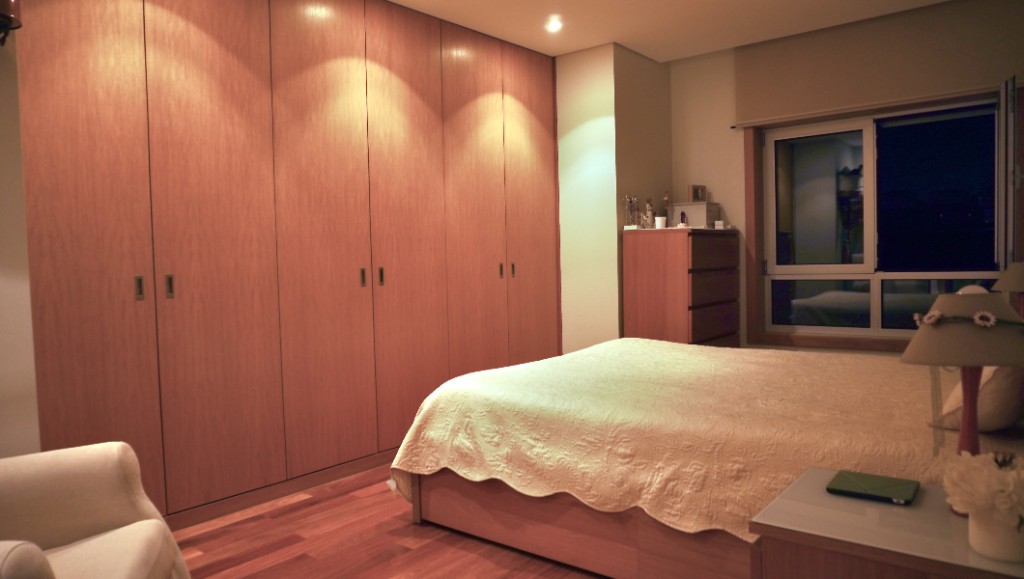
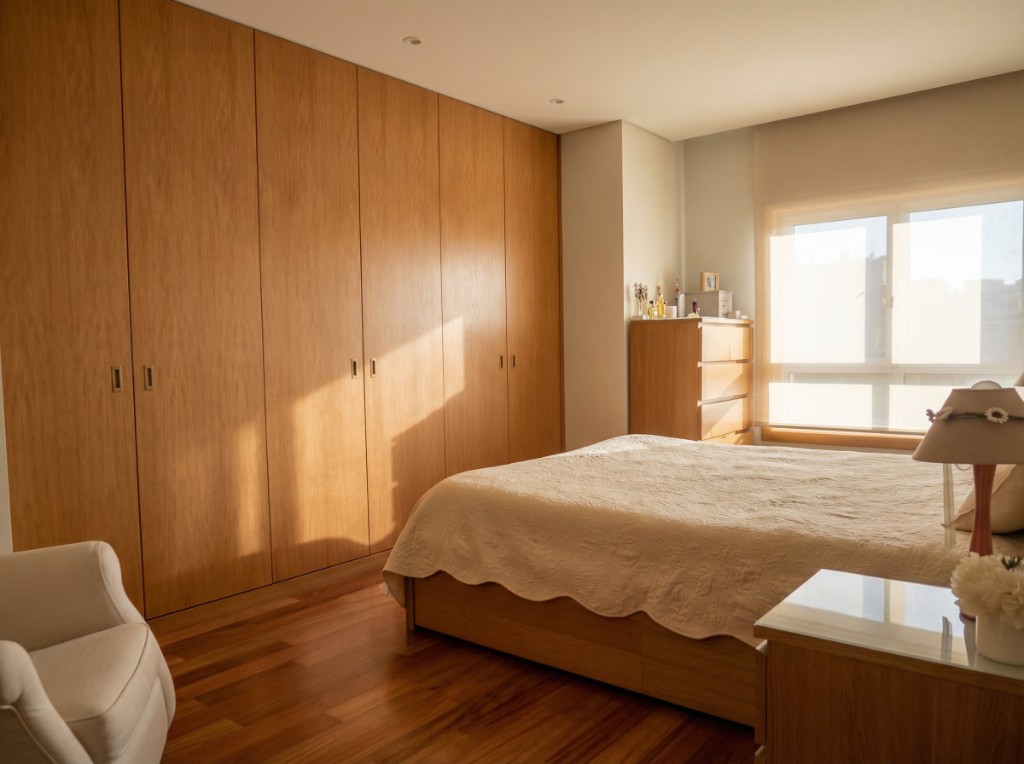
Brightness is the first thing people notice in a before-and-after, but it is the least important test. A good enhancement pass improves several quality signals at once, and the result should still look like a photograph of that room.
What to check in the after image
Judge enhanced photos against this list, not against a feeling of 'brighter is better':
- exposure is balanced across the full frame — no black corners, no white windows
- color temperature looks natural; whites are neutral, not blue or yellow
- edges are clear without a crunchy, over-sharpened look
- materials and finishes are easier to read (floor grain, worktop texture, tile pattern)
- the whole listing set shares the same tone — the kitchen and the bedroom look like the same house
Build your own benchmark library
Save your three or four strongest before-and-after pairs by room type and use them as the standard for future listings and for onboarding new agents. It is the fastest way to align a team on what 'ready to publish' means. Use the real estate photo editing checklist for agents as the written version of that standard.
Keep comparisons honest
Use the same framing for before and after. Enhancement should improve light, color, and clarity — it should never change the condition of the property, hide damage, or alter fixtures. Buyers who feel misled at the viewing do not make offers.
Room-by-room tips
Small adjustments per room type give noticeably better results:
- living rooms: prioritize balanced exposure between the window and the seating area
- bedrooms: slightly warm white balance, neutral bedding tones — see how to make dark room real estate photos look bright for north-facing rooms
- kitchens: clarity on worktops and cabinet fronts, neutral whites, no yellow cast
- bathrooms: cool, clean whites and reduced reflections on tiles and mirrors
- exteriors: blue sky, lifted facade, and grass that looks green but not neon
What AI can and cannot fix
AI is very strong at exposure, color, clarity, perspective, and sky. It can also remove many small distractions — a bin, a cable, a car in the driveway — with the object-removal workflow. What it cannot do is invent information that was never captured: a photo that is badly out of focus, extremely dark with no detail in the shadows, or shot from a corridor showing 10% of the room will still be a weak photo after enhancement. In those cases re-shoot the room; it takes two minutes and saves credits. For a list of the usual capture problems, read common real estate photo mistakes and how to fix them.
How it fits in your listing workflow
The order that works: capture, enhance, stage the empty rooms, quick QA, publish. Enhancement first means every staged output starts from a clean, well-lit photo, and every un-staged photo in the gallery matches the staged ones. Teams that skip enhancement and only stage end up with a gallery where two rooms look premium and the rest look like phone snapshots.
Cost-wise, enhancement uses one credit per image. On PhotoStaging annual plans that is roughly €0.19–€0.24 per photo (€290/year for 1,200 credits, €690/year for 3,600), or €29/month for 100 credits if you prefer monthly. A twenty-photo listing costs under €5 to enhance end to end, versus €1–€3 per image and a day of waiting with a typical outsourced editing service.
Photo enhancement guides by problem
Different listings fail for different reasons, so use the guide for the issue in front of you. If you are choosing software, start with the best real estate photo enhancement software for 2026. If you want the general workflow, use how to improve real estate photos.
- how to improve realtor photos taken with a phone for agents shooting listing photos on mobile
- common real estate photo mistakes and how to fix them for quick quality improvements
- real estate photo lighting tips for agents for brighter, cleaner captures
- how to make dark room real estate photos look bright for low-light interiors
- day-to-dusk and sky replacement for listings for exteriors and twilight shots
- does virtual staging work with smartphone photos if you plan to stage after enhancing
Next steps
Try it on your next listing, especially rooms with strong window light, mixed bulbs, or dark interiors — those are where the difference is most visible. Compare tools in the best real estate photo enhancement software for 2026 guide if you are still deciding, see the workflow and pricing on the photo enhancement software page, or start with PhotoStaging and use the free credits on a real property.
Frequently asked questions
Does AI photo enhancement make images look fake?
Good enhancement keeps the image realistic. The goal is a listing photo that looks like a great photographer was there, not a stylized rendering. If a result looks over-processed, regenerate it.
Can I use enhanced photos on all major portals?
Yes. AI photo enhancement produces standard JPEGs that upload to any portal, MLS, or social channel without issues.
Can I enhance photos taken with a phone?
Yes — it is the most common use case. Capture the brightest shot you can, keep the phone level at chest height, and let AI handle exposure, color, and perspective.
Can I enhance old listing photos?
Yes. Many agents re-run older listings through enhancement to refresh their portfolio, past-sales page, and marketing materials.
Does enhancement change the actual space?
No. Enhancement adjusts light, color, clarity, and sky. It does not change architecture, fixtures, finishes, or the condition of the property.
How much does it cost to enhance a listing?
One credit per image. On PhotoStaging annual plans that is about €0.19–€0.24 per photo, so a twenty-photo listing costs under €5. New accounts get 10 free credits.
Ready to start?
Create listing-ready visuals in minutes. No credit card required.